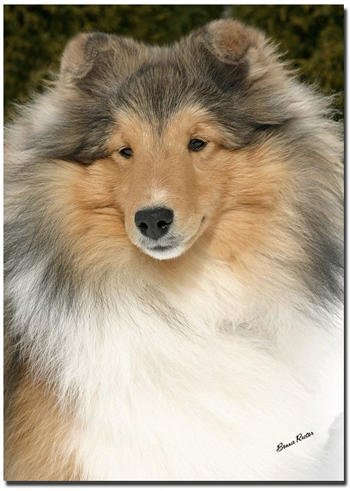
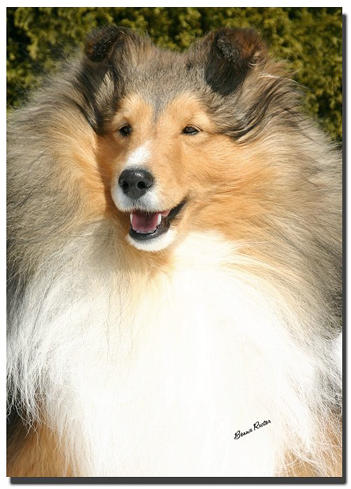
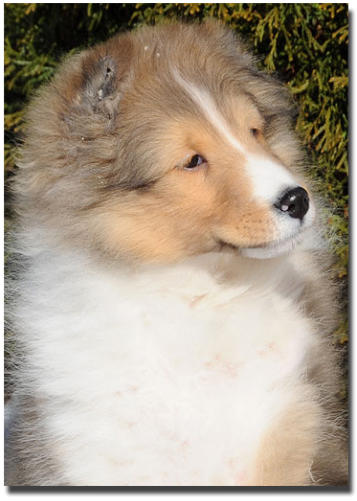
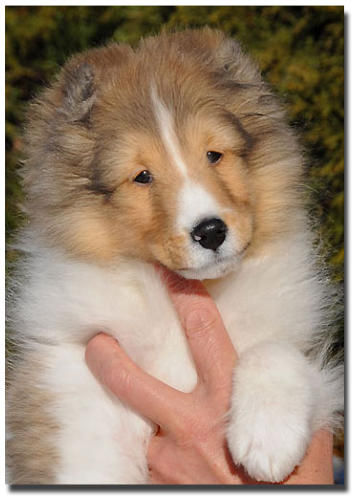
There is nothing prettier than a sheltie with perfect little ears that are correctly placed and tipped as they should
be. Most don't "just happen" it usually takes perseverance and time. I usually start to train ears at a very young
age. Most puppies have their ears pulled up and glued around six weeks, but serious training of ears begin at 10
weeks of age and will continue until about 6 months old. If you are diligent with ear training, you will have
beautiful ears sets, like these two pictured below.
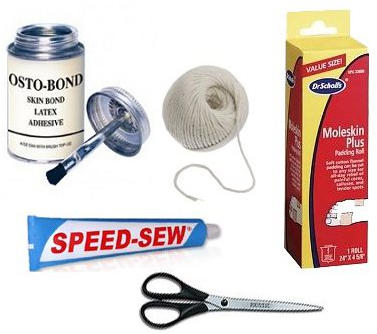
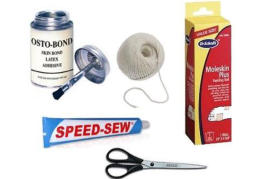
The materials you will need are Dr. Scholl's® Moleskin, Osto-
Bond Skin Bond Latex Adhesive, (or Torbot Liquid Bonding
Cement) Speed Sew, string and scissors.
NOTE: Osto-Bond Skin Bond and Torbot are used to adhere
ostomy appliances to human skin. It is safe to use. You can
purchase it at most home care pharmacies.
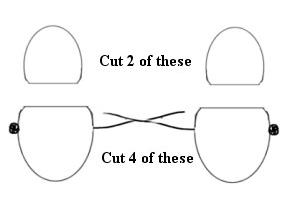
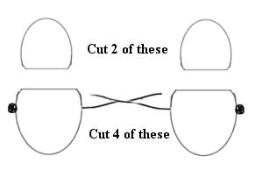
You will need to cut the moleskin into 6 pieces as pictured
here.
Make the bottom
part of the brace
slightly larger
than the ones you will use for the top.
Cut two pieces of string about 6 inches in length and put a knot in one
end of each piece
Put the string between the bigger two pieces of moleskin, remove the
backing on the piece you will use for the top, and using the Torbot
Liquid Bond Cement, glue the two pieces together. Repeat for the
other brace.
The size that you cut the braces will depend on how old and how big your puppy is. You may want to cut a pattern
out on paper first to see if the size will be right.
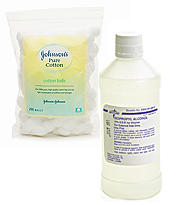
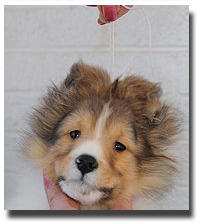
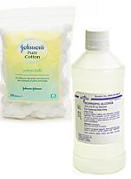
Now you are ready to brace the ears. Make sure the ears are clean, and dry. Rubbing alcohol and
cotton balls work well and dries quickly.
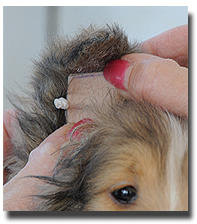
Remove the backing from the moleskin with the string and apply the Torbot Liquid Bond
Cement to the sticky side of the moleskin. Insert the moleskin into the ear as
illustrated on the left. Hold in place until the glue is dry.
(60 seconds or so) Repeat for the opposite ear.
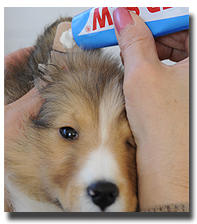
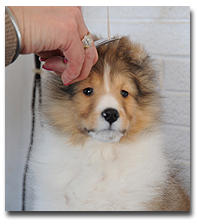
You can now take the smaller piece of the moleskin and
remove the backing from the moleskin and apply the Torbot
Liquid Bond Cement to the sticky side as above and glue to
the inside tip of the ears, as shown on the right.
Now take your speed sew and glue the top piece of the
moleskin to the bottom piece of the moleskin (as
illustrated) .
Be careful to tip both ears equally. Hold in place until the
speed sew is dry, and repeat on the other ear.
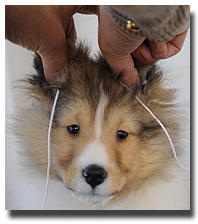
Finally we are ready to pull
the ears up on top of the
head and tie the string.
I always tie two or three
knots (maybe overkill) and
cut off the excess string.
Be sure and hold the puppy in your arms for 5 or 10 minutes to make sure that all the adhesive has set, and the
puppy will not be able to shake or scratch the braces out. In no time at all they forget about the bonnet you have
created on the top of their head.
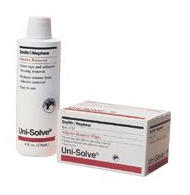
This brace should be good for at least two to three weeks.
You will start to see it coming loose and need to remove it
with Smith and Nephew Adhesive Remover.
(DO NOT TRY TO PULL THEM OFF WITHOUT USING ADHESIVE REMOVER)
I usually leave the ears braces out for a day or two, so I can see how they are setting.
I can then clean them and reapply a new brace.
Here is baby
Marcus all
finished.
What a good
boy
he was.
Marcus is
owned
and bred by
Crinan
Shelties.
I have tried many different types of ear taping and gluing, but have found this works the best.
Thanks to Evelyn Susin (Crinan Shelties) for helping with photos and lending us Marcus for the demonstration.


HOW TO
HAVE
PERFECT
SHELTIE
EARS


Copyright © All Rights Reserved


